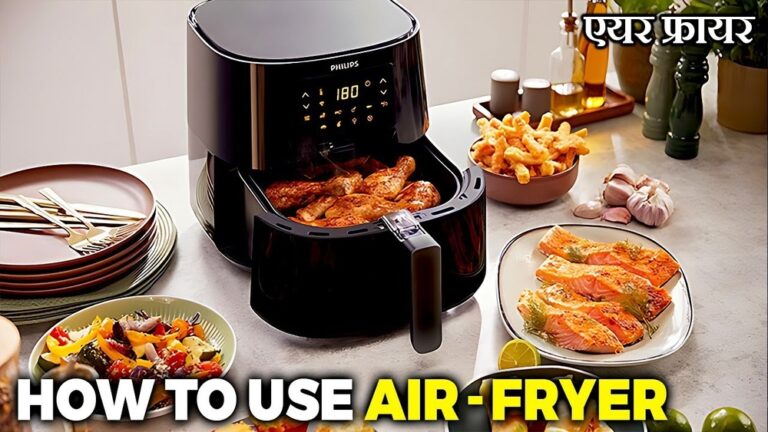
How To Use Ninja Air Fryer 9-In-1
The Ninja Air Fryer 9-In-1: Your Complete Guide to Mastering Every Function
The kitchen has changed a lot in recent years. One of the most popular new tools is the Ninja Air Fryer 9-In-1. This device is more than just an air fryer—it’s a multi-cooker that can handle nine different cooking methods. Many people buy it for its promise to cook food faster and with less oil. But with so many buttons and options, it can feel confusing at first.
If you just got your Ninja Air Fryer 9-In-1 or want to use it better, this guide will help you. You’ll learn what each function does, how to use each feature, and get practical advice for safe, tasty results every time.
Getting To Know Your Ninja Air Fryer 9-in-1
Before cooking, it’s important to understand what makes this appliance special. The Ninja Air Fryer 9-In-1 combines:
- Air Frying
- Roasting
- Baking
- Broiling
- Dehydrating
- Reheating
- Toasting
- Bagel Mode
- Keep Warm
Each mode is designed for a different style of cooking, which means you can prepare everything from crispy fries to juicy chicken, or even dried fruit snacks.
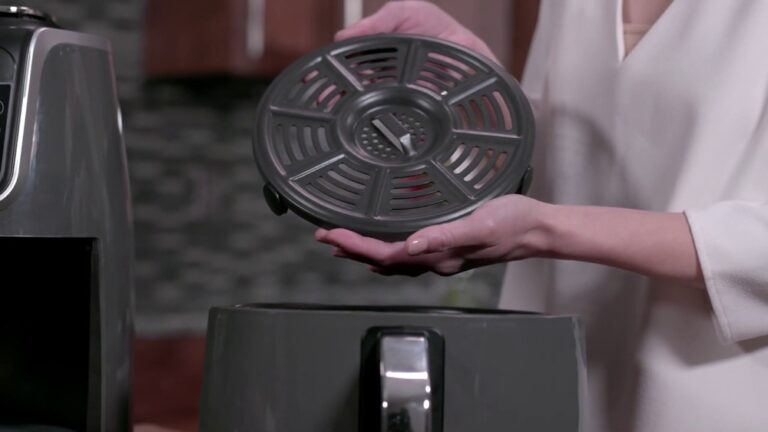
Key Parts Of The Ninja Air Fryer 9-in-1
Take a moment to familiarize yourself with these main parts:
- Control panel: Where you choose the cooking mode and adjust time and temperature.
- Crisper plate/tray: Holds food above the base for better air circulation.
- Basket or cooking pot: Where you place your ingredients.
- Heating element and fan: The core of the air fryer, this circulates hot air for even cooking.
- Accessories: Some models include racks, skewers, or baking pans for different recipes.
Setting Up Your Ninja Air Fryer 9-in-1
- Unpack and clean: Wash the basket, crisper plate, and any accessories with warm soapy water. Wipe the main unit with a damp cloth.
- Place on a flat surface: Keep it away from walls and overhanging cabinets for good air flow.
- Plug it in: Make sure the cord is secure but not stretched.
- Run a test cycle: Before first use, run the air fryer empty for about 10 minutes on air fry mode. This removes any factory smell.
Understanding The 9 Functions
Knowing what each mode does will help you cook the right way.
Air Fry
This is the most popular mode. Air fry uses rapid hot air to crisp foods with little or no oil. Great for fries, chicken wings, or frozen snacks.
Roast
Roast mode cooks at a steady high heat, ideal for meats, vegetables, and casseroles. It gives a deep, oven-roasted flavor.
Bake
Bake mode works like a small oven, perfect for cakes, muffins, or bread. It’s a good alternative to heating up a big oven for small batches.
Broil
Broil mode cooks food quickly with direct heat from above, making it great for melting cheese, crisping the tops of casseroles, or finishing meats.
Dehydrate
Dehydrate mode uses low heat to remove moisture from foods over several hours. Use it for making dried fruits, vegetable chips, or jerky.
Reheat
Reheat mode gently warms leftovers without drying them out or making them soggy, unlike a microwave.
Toast
Toast mode is for slices of bread. It gives a crispy outside and soft inside.
Bagel
Bagel mode is similar to toast but only heats the cut side of bagels, making it crisp while keeping the outside soft.
Keep Warm
Keep warm mode maintains cooked food at a safe, warm temperature until you’re ready to eat.
Using Each Function Step-by-step
Let’s look at how to use each function with simple instructions and tips.
1. Air Fry
- Place food in the basket on the crisper plate.
- Select Air Fry on the panel.
- Set temperature (usually 180–200°C or 350–400°F).
- Set time (most foods need 10–25 minutes).
- Shake or turn food halfway for even cooking.
Pro tip: Don’t overcrowd. Food needs space for air to move around.
2. Roast
- Use the basket or a roasting tray.
- Choose Roast.
- Set temperature (often 180–210°C or 350–410°F).
- Set time as needed (e.g., chicken breast: 20–25 minutes).
- Check for doneness with a food thermometer.
Non-obvious insight: Roasting root vegetables? Cut pieces evenly and toss with a bit of oil and salt for best browning.
3. Bake
- Use a cake pan or muffin tin that fits inside.
- Select Bake.
- Set temperature (usually 160–180°C or 325–350°F).
- Set the timer (cakes: 20–30 minutes).
- Check with a toothpick in the center.
Mistake to avoid: Don’t fill pans too high—the air fryer bakes faster than a big oven.
4. Broil
- Place food on the crisper tray near the heating element.
- Select Broil.
- Set temperature (often 200–210°C or 390–410°F).
- Time is usually short (4–10 minutes).
- Watch carefully to avoid burning.
Practical tip: Broil cheese-topped dishes or finish steaks for a seared crust.
5. Dehydrate
- Slice food thin and arrange in a single layer on racks.
- Select Dehydrate.
- Set temperature (50–70°C or 120–160°F).
- Set timer (4–8 hours depending on food).
- Rotate racks halfway through for even drying.
Beginner’s miss: Don’t add oil; oil will spoil dried food faster.
6. Reheat
- Place leftovers in the basket.
- Select Reheat.
- Set temperature (120–160°C or 250–320°F).
- Set time (3–8 minutes).
- Check and add more time if needed.
Non-obvious insight: Foods like pizza reheat better in the air fryer than in a microwave—crisp, not soggy.
7. Toast
- Place bread slices on the tray.
- Select Toast.
- Choose light, medium, or dark setting.
- Toast 2–4 minutes depending on preference.
Practical tip: Preheating is not needed for toast mode.
8. Bagel
- Place bagels cut side up.
- Select Bagel.
- Choose shade level.
- Bagels toast in 3–5 minutes.
Mistake to avoid: Don’t overlap bagels—they need space for even toasting.
9. Keep Warm
- After cooking, select Keep Warm.
- Food stays at a safe temperature (around 70°C or 160°F).
- Up to 30–60 minutes is usually safe for taste.
Pro tip: Use this for family meals when people eat at different times.
Cooking Times And Temperature Reference
Here’s a quick look at how long and hot to cook popular foods:
| Food | Function | Temperature (°C) | Time (minutes) |
|---|---|---|---|
| French Fries (Frozen) | Air Fry | 200 | 15–20 |
| Chicken Breast | Roast | 190 | 22–25 |
| Chocolate Cake | Bake | 160 | 25–30 |
| Dried Apple Slices | Dehydrate | 60 | 5–6 hours |
| Pizza Slice (Reheat) | Reheat | 150 | 5–7 |
Accessories And When To Use Them
Accessories expand what you can do. Here’s how they compare:
| Accessory | Best For | Not Ideal For |
|---|---|---|
| Crisper Plate | Fries, Chicken Wings | Liquid Batters |
| Baking Pan | Cakes, Muffins | Large Roasts |
| Multi-Layer Rack | Dehydrating, Toast | Heavy Foods |
Not every accessory comes with every model, but you can buy extras.
Cleaning And Maintenance
Keeping your Ninja Air Fryer 9-In-1 clean is important for safety and food taste.
- Let it cool before cleaning.
- Wash basket, crisper plate, and racks with warm soapy water. Most parts are dishwasher safe.
- Wipe the inside with a damp cloth—never use steel wool or harsh cleaners.
- Clean the heating element gently with a soft brush if needed.
Non-obvious insight: A dirty air fryer will smoke and make food taste bad. Clean after every use, especially after fatty foods.
Safety Tips
- Don’t block the air vents during cooking.
- Hot air comes out the back—keep away from walls and flammable objects.
- Always use oven mitts to remove hot food or accessories.
- Don’t use cooking sprays with propellants—they damage the nonstick surface. Use a brush or pump spray bottle with real oil.
- Children should be supervised around the appliance.
Troubleshooting Common Problems
If you run into issues, here’s how to solve them:
| Problem | Possible Reason | Solution |
|---|---|---|
| Food not crispy | Overcrowded or low temp | Cook in batches, raise temp |
| Smoke during cooking | Dirty unit or too much oil | Clean and reduce oil |
| Uneven cooking | Food not turned | Shake or flip food halfway |
| Touch panel not responding | Wet hands or error | Dry hands, unplug and restart |
Pro Tips For Best Results
- Preheat for 2–3 minutes for the crispiest results, unless the mode says otherwise.
- Use parchment paper with holes or silicone mats to make cleanup easier.
- Marinate meats before air frying for deeper flavor.
- For baking, check a few minutes early—air fryers often cook faster than ovens.
- To dehydrate, rotate trays halfway through for even drying.
Beginner mistake: Many users forget to shake or stir food. This is key for even browning and texture.

Credit: www.ninjakitchensa.com
Recipes To Try First
If you’re new, try these simple ideas:
- Air fry: Potato wedges tossed in olive oil and salt.
- Roast: Mixed vegetables with rosemary.
- Bake: Chocolate chip muffins.
- Broil: Cheese toast or garlic bread.
- Dehydrate: Banana chips with a sprinkle of cinnamon.
You can find thousands of recipes online and in the official Ninja recipe book.
For more detailed recipes, the Ninja Kitchen official site is a trustworthy source.
Saving Time And Energy
One big reason for the Ninja Air Fryer’s popularity is energy efficiency. It heats up much faster than an oven and often uses 30–50% less electricity. It also cooks faster, which saves time on busy days.

Credit: www.walmart.com
Frequently Asked Questions
Is It Safe To Put Aluminum Foil In The Ninja Air Fryer 9-in-1?
Yes, you can use small pieces of aluminum foil in the basket or tray, but never cover the entire bottom. Always leave room for air to flow.
How Do I Prevent Food From Sticking To The Basket?
Lightly coat the basket or tray with vegetable oil using a brush or spray. Avoid aerosol sprays with chemicals.
Can I Cook Frozen Food Directly In The Air Fryer?
Absolutely. Most frozen foods (like fries, nuggets, or fish sticks) cook well without thawing. Just add a few extra minutes to the cook time.
Why Does My Air Fryer Make A Loud Noise?
The strong fan is normal and part of how the fryer works. If you hear rattling or grinding, check for loose parts or debris.
How Do I Know When Food Is Fully Cooked?
Use a food thermometer for meats or check the color and texture for other foods. When in doubt, add a few more minutes.
The Ninja Air Fryer 9-In-1 can quickly become your favorite kitchen tool. With so many functions, you’ll find yourself making healthier, tastier meals with less effort. The key is to experiment, keep your unit clean, and pay attention to the details.
Once you get comfortable, you’ll wonder how you cooked without it.