How Long Does It Take to Season a Blackstone Griddle: Ultimate Guide
You’ve just unboxed your Blackstone griddle, and you’re eager to fire it up and start cooking. But before you toss on those burgers or pancakes, there’s one crucial step you can’t skip: seasoning your griddle.
You might be wondering, “How long does it take to season a Blackstone griddle properly? ” The answer isn’t just about time—it’s about creating the perfect non-stick surface that makes cooking easier and cleanup a breeze. You’ll discover exactly what to expect during the seasoning process, how to tell when your griddle is ready, and the simple steps that ensure your cooking surface stays in top shape.
Keep reading, and you’ll be flipping food like a pro in no time.
Credit: blackstoneproducts.com
Seasoning Basics
Timing the seasoning process for your Blackstone griddle is key to building a strong, non-stick surface. Seasoning takes patience and care. Rushing the process can cause uneven layers or sticky spots. Knowing how long to heat and oil the griddle helps you get the best results. Proper timing also prevents damage and saves you time in the long run.
Initial Seasoning Duration
The first seasoning usually takes about 45 minutes to an hour. Heat the griddle on medium-high and apply a thin layer of oil. Let it smoke and burn off completely before adding more oil. This step forms the base layer that protects the metal and starts the non-stick coating. Avoid skipping or shortening this step for best results.
Multiple Thin Layers Vs One Thick Layer
Applying many thin layers of oil works better than one thick layer. Thin layers dry and bond faster, creating a smooth finish. Thick layers can stay sticky or peel off. After each layer smokes away, wipe the surface and add another thin coat. Repeat this 3 to 5 times to build a durable seasoning.
Smoke As A Timing Indicator
Watch the smoke closely during seasoning. Smoke means the oil is burning off and bonding to the griddle. When smoke stops, the layer is set. Adding oil too soon, while smoking continues, can cause sticky patches. Use smoke as a natural timer to know when to add the next layer or finish the process.
Timing The Seasoning Process
Proper seasoning of your Blackstone griddle creates a protective, non-stick coating. This coating improves cooking and protects the metal from rust. You can tell when the seasoning is right by observing certain clear signs. These signs show the griddle is ready to use and will perform well.
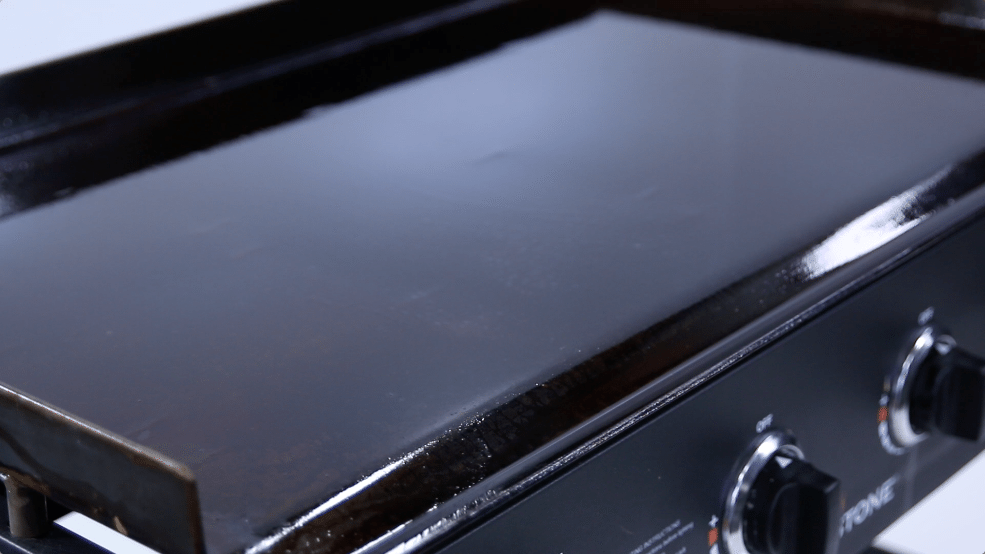
Dark, Even Color
The griddle surface should have a dark, rich black color. This color covers the entire cooking area evenly. No shiny or raw metal spots should be visible. A deep black tone means the oils have baked into the metal. This layer protects the griddle and enhances heat distribution.
Non-stick Surface
Food should not stick to the griddle surface. Eggs, pancakes, or burgers slide off easily. This smooth surface results from multiple thin oil layers baked in. The non-stick quality means less oil is needed for cooking. It also makes cleaning simple and quick.
Water Bead Test
Drop a few drops of water on the griddle surface. If the water forms small beads and dances around, the seasoning is strong. The beads will quickly sizzle and evaporate. If the water soaks in or spreads out, the seasoning needs more work. This simple test helps confirm the griddle is ready.
Signs Of Proper Seasoning
Knowing when to re-season your Blackstone griddle keeps it cooking at its best. Over time, the seasoning layer can wear down. Re-seasoning restores the protective coating and keeps food from sticking. Watch for key signs that tell you it’s time to re-season.
Food Sticking Issues
Food sticking to the griddle surface is a clear sign. If pancakes, eggs, or burgers tear when flipped, seasoning is wearing off. A well-seasoned griddle lets food slide easily. Persistent sticking means the oil layer has thinned or worn away. Re-seasoning rebuilds this smooth, non-stick surface.
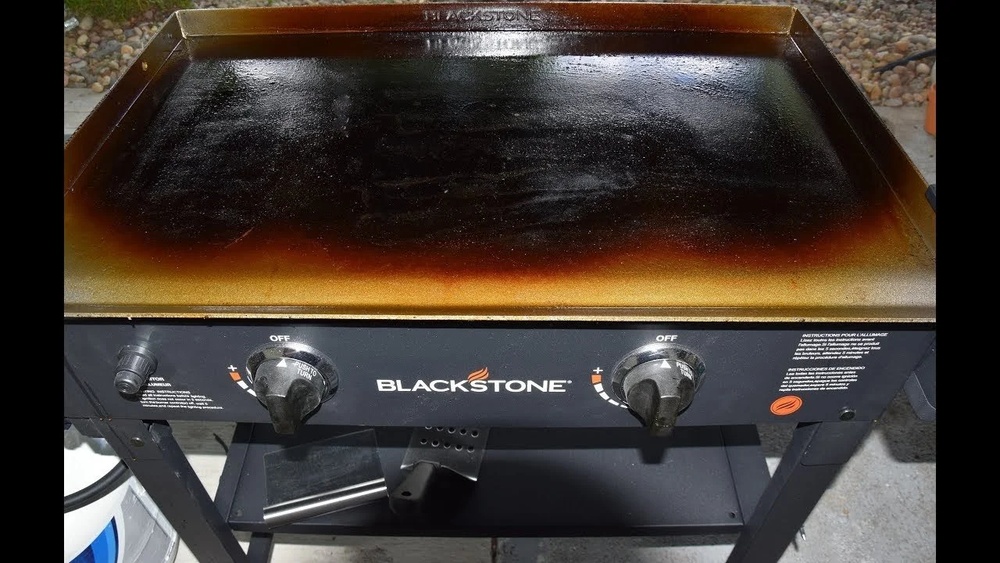
Rust Or Discoloration
Rust spots or color changes show the seasoning is damaged. Moisture can cause rust on the metal surface. Dark black seasoning should be even and consistent. Any red or brown rust patches mean the oil layer is gone. Clean the rust and re-season immediately to protect the griddle.
Patchy Or Dull Surface
A patchy or dull surface signals uneven seasoning. The griddle should have a shiny, smooth finish. If some areas look light or rough, seasoning is missing there. This causes uneven heating and sticking. Applying new oil layers and heating the griddle fixes this problem quickly.

Credit: www.thegrillcoach.com
When To Re-season
Maintaining the seasoning on your Blackstone griddle keeps it performing well for years. Proper upkeep builds a strong, non-stick surface. It prevents rust and improves cooking results. Simple daily habits protect your seasoning and extend its life.
Cooking Practices That Improve Seasoning
Cook on medium to medium-high heat to keep seasoning intact. Avoid burning food, which can damage the surface. Use oils with high smoke points, like vegetable or canola oil. Spread thin layers of oil before cooking. This adds to the seasoning each time you cook.
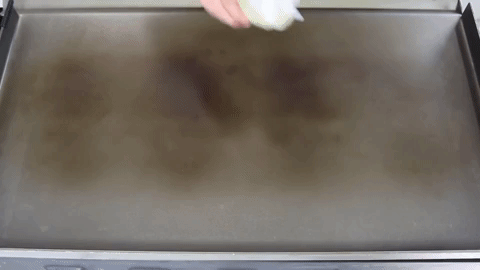
Post-cook Cleaning And Oiling
Clean your griddle while it is still warm. Use a scraper or spatula to remove food bits. Wipe the surface with a paper towel or cloth. Apply a thin layer of oil after cleaning. Heat the griddle for a few minutes to set the oil. This keeps the seasoning smooth and protected.
Avoiding Soap And Harsh Cleaners
Never use soap or strong cleaners on your seasoned griddle. These remove the oil layer and cause rust. Stick to scraping and wiping with warm water. For tough spots, use a gentle scrubber or salt. Keep your seasoning safe by avoiding chemicals.
Seasoning Maintenance Tips
Seasoning a Blackstone griddle can sometimes cause issues. Troubleshooting helps fix common seasoning problems. These problems include uneven seasoning, rust, or sticky surfaces. Knowing how to fix these can save time and improve cooking results. Here are some tips to handle common seasoning issues effectively.
Fixing Over-seasoned Griddles
Over-seasoning creates a thick, sticky layer on your griddle. This layer can cause food to stick or burn. To fix it, heat the griddle until the sticky layer softens. Use a metal spatula to scrape off excess seasoning gently. Then, wipe the surface with a cloth and apply a thin oil layer. Repeat light seasoning to build a smooth finish.
Dealing With Rust Spots
Rust spots form if moisture stays on the griddle. Remove rust by scrubbing with steel wool or a scrub pad. Clean the area well and dry the griddle completely. Apply a thin coat of cooking oil and heat the griddle to protect it. Regular cleaning and oiling prevent rust from returning.
Rebuilding A Damaged Seasoning Layer
A damaged seasoning layer may peel or flake. Start by removing loose seasoning with a scraper or steel wool. Clean the surface thoroughly to remove debris. Heat the griddle and apply a thin, even layer of high-smoke-point oil. Let it smoke and cool. Repeat this process several times to rebuild a strong seasoning layer.
Troubleshooting Seasoning Problems
Seasoning frequency and long-term care keep your Blackstone griddle in top shape. Regular seasoning builds a strong, non-stick surface. Proper care extends the griddle’s life and cooking quality. Knowing how often to season helps prevent rust and food sticking. Storing the griddle right protects the seasoning from damage. These simple steps maintain your griddle’s performance over time.
How Often To Season
Season your Blackstone griddle before the first use. After that, season it every 10 to 15 uses. If you cook oily or acidic foods often, season more frequently. Regular seasoning keeps the surface smooth and non-stick. Light seasoning is better than skipping it for long periods. A quick oil layer after each cooking session helps maintain the coating.
Signs It’s Time For Touch-ups
Watch for food sticking to the surface. Rust spots or dull patches show the seasoning is wearing off. If the griddle looks dry or gray, it needs more oil and heat. Uneven color or flaking means re-seasoning is needed. Use the water bead test: water should sizzle and roll off. If it soaks in or evaporates slowly, add another seasoning layer.
Storing Your Griddle Properly
Clean your griddle after each use by wiping off food and grease. Avoid using soap, which can strip the seasoning. Apply a thin layer of oil to the surface before storage. Cover the griddle with a weatherproof cover to keep moisture out. Store the griddle in a dry, sheltered place to prevent rust. Proper storage keeps the seasoning strong and ready for your next cook.
Seasoning Frequency And Long-term Care
Proper seasoning of a Blackstone griddle depends on the right tools and accessories. These items help prepare the surface, apply oil evenly, and maintain the seasoning over time. Using quality tools makes the process faster and more effective. It also protects the griddle’s surface and improves cooking results.
Best Scrapers And Brushes
Use a metal scraper to remove debris and old seasoning. It clears the surface without scratching the griddle. A stiff-bristle brush helps clean tight spots and corners. Choose brushes made of stainless steel or brass for durability. Avoid soft or plastic brushes that wear out quickly. Scrapers and brushes keep the griddle smooth and ready for oiling.
Recommended Oils And Sprays
Pick oils with high smoke points for seasoning, such as flaxseed, grapeseed, or canola oil. These oils create a strong, lasting layer. Avoid cooking sprays with additives; they can leave sticky residues. Use pure oils for better results. Apply a thin, even coat to the griddle surface. Repeat the process several times for a durable seasoning.
Heat Sources For Seasoning
The Blackstone griddle’s built-in burners work well for even heating. Consistent heat helps oils bond to the metal surface. Use medium-high heat to reach the right temperature quickly. Avoid overheating, which can damage the seasoning layer. Outdoor propane burners or grills can also provide steady heat. Proper heat is key to creating a smooth, non-stick finish.
Credit: blackstoneproducts.com
Frequently Asked Questions
How Do You Know When Your Blackstone Is Seasoned Properly?
Your Blackstone is seasoned properly when the surface is dark, smooth, and food no longer sticks. Water droplets should bead and sizzle. The seasoning appears even and black, creating a non-stick layer from repeated oiling and heating until smoke stops.
Can You Over Season A Blackstone Griddle?
Yes, you can over season a Blackstone griddle. Excess oil layers cause a sticky, uneven surface. Apply thin oil coats and heat properly to avoid this.
What Temperature Do You Season A Griddle At?
Season a griddle at 400-450°F. Heat it until oil smokes, then apply thin oil layers. Repeat for a durable, non-stick surface.
How Often Are You Supposed To Season Your Blackstone Griddle?
Season your Blackstone griddle before first use and after every deep clean. Regular cooking with oil also builds seasoning layers naturally.
Conclusion
Seasoning a Blackstone griddle takes a few hours and several steps. The surface turns dark and smooth when ready. Food will slide easily without sticking. The water bead test helps check seasoning strength. Regular cooking and oiling keep the griddle in good shape.
Patience and care provide the best cooking surface. Enjoy your griddle once the seasoning feels right. Keep seasoning after heavy use to maintain non-stick quality. This process ensures better flavor and longer griddle life.